I recently made the Encinitas Cardigan out of Berroco Calico. It's a great sweater! So easy and quick. So easy, in fact, that several times (not once) I made the same mistake. It's an easy pattern, knit 3 rows, purl 3 rows, and repeat. I must have been in a trance when knitting as I threw an extra knit row into the pattern 3 times, which I didn't even notice until I had completed the back and was well on my way into the right front. The yarn is variegated, and in this modified garter stitch pattern, it was really difficult to even see my mistake. In fact, it was so hard to see, that I thought I'd cheat and just leave it that way. But then one day I had that piece of the sweater on my kitchen table. I happened to walk by and for some reason, out of the corner of my eye, those three extra rows just JUMPED out and screamed at me. All of a sudden they were so noticeable. So I knew what I must do.
I could have ripped the back out and reknit it. But that's too easy, and there's more than one way to skin a cat. So I decided to cut and graft. You think people freak out when we rip out their knitting? You should see what happens when Mr. Scissors comes out of the drawer. Here are the step by step pictures of how i fixed this mistake:
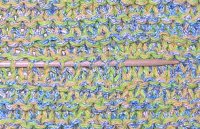
- I've highlighted the mistake for your viewing pleasure. One extra row of stockinette.

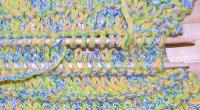
- I used a long Brittany needle to pick up the entire row of stitches above the mistake row. Hint: I knit the sweater on size 8 US needles. I used a size 4 needle to pick up the stitches. It's much easier (and faster) to get a small needle through!

- Then I picked up an entire row of stitches 3 rows below the row that I just picked up. (Why 3 rows below? Well, then I have 2 rows of stitches in between each needle. One is needed in the pattern, and one is the "extra" row that I need to remove. I plan to remove both of them, and then put the 2 pieces back together by grafting. This grafted row will replace the actual row that is needed in the pattern.)

- Now out comes Mr. Scissors. I cut a strand from the knitted row below the row on the upper needle. I do this about 15 stitches in from the right side. HINT: This will be an end you need to weave in. If you cut right on the edge, you won't have enough yarn to weave in, and you could end up unravelling something you don't want to be unravelled!

- With a spare needle or a tapestry needle (I like these best) I start undoing the stitches one at a time. I first worked the short tail over toward the right side.

- Then I undid the left side. Once I undid that entire row, I could just rip out the row below. And no fear here - it's not going to go any further than I want, because I've already got those stitches locked onto the lower needle.

- Then the fun part. Grafting! Grafting is basically kitchener stitch, but you don't pull it so tight that it makes a seam. You pull it just enough to make your seam act as an entire row of your work. In this case it was stockinette so it was pretty simple.

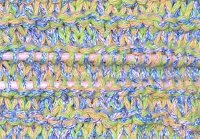
- Almost finished! And what an improvement!

This whole grafting business definitely took a bit of time, and who knows? I probably could have ripped back and reknit it in the same amount of time, but sometimes it's good to push yourself to do something you wouldn't normally do. And now it's finished, looks great, and I can move on to the next one!
No comments:
Post a Comment